Building a gunite swimming pool is a major construction project that requires careful planning and execution. Here is a step-by-step guide on how to build a gunite inground pool.
1. Choose a Design and Location
The first step in building a gunite pool is to choose a design and location for your pool. Consider the size and shape of your yard, as well as any zoning regulations or building codes that may apply. You’ll also want to consider factors such as sun exposure, landscaping, and views. It’s a good idea to consult with a pool designer or builder at this stage to help you plan the best pool for your needs and budget.
2. Obtain Permits and Approvals
Before you can begin construction, you’ll need to obtain any necessary permits and approvals from your local building department. This may include a building permit, a plumbing permit, and any other required approvals. Be sure to submit all required documents and pay any fees to avoid delays in the construction process.
3. Excavate the Pool Site
Once you have your permits and approvals, it’s time to start digging. Excavation is typically done with heavy machinery, such as a backhoe or bulldozer. The excavation process will involve removing dirt and other materials to create the hole for your pool. Be sure to follow any local regulations regarding the disposal of excavation materials.
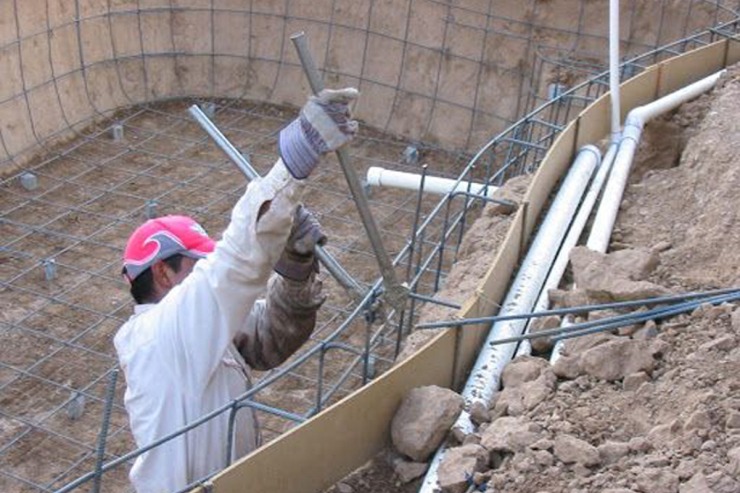
4. Install the Rebar Frame
Once the excavation is complete, the next step is to install the rebar frame. Rebar is a type of steel rod that is used to reinforce concrete structures. The rebar frame will provide support for the gunite shell of your pool. The rebar is typically installed in a grid pattern, with the vertical rebar spaced about 18 inches apart and the horizontal rebar spaced about 12 inches apart.
5. Spray the Gunite
Once the rebar frame is installed, it’s time to spray the gunite. Gunite is a mixture of cement and sand that is mixed with water and sprayed onto the rebar frame using a special gunite machine. The gunite is applied in layers, with each layer allowed to dry before the next layer is applied. It’s important to follow the manufacturer’s instructions when spraying the gunite to ensure that it cures properly.
6. Finish the Pool Surface
Once the gunite has cured, the next step is to finish the pool surface. This typically involves applying a coat of plaster to the gunite shell. The plaster can be colored and textured to your liking, and it provides a smooth, durable finish for your gunite pool.
7. Install the Pool Equipment
After the pool surface is finished, it’s time to install the pool equipment. This typically includes a pump, filter, heater, and any other equipment that you want to include in your pool. Be sure to follow the manufacturer’s instructions when installing the equipment to ensure that it operates safely and efficiently.
8. Fill and Test the Pool
Once the pool equipment is installed, it’s time to fill the pool with water. This can take several days, depending on the size of your pool. Once the pool is full, test the water chemistry and make any necessary adjustments. You may also want to test the pool equipment to ensure that it is working properly.
Building an inground gunite pool is a significant undertaking, but it can be a rewarding experience that adds value and enjoyment to your home. By following these steps, you can ensure that your pool is built safely and to your satisfaction.